How to Use Squat Rack: a Guide for Beginners
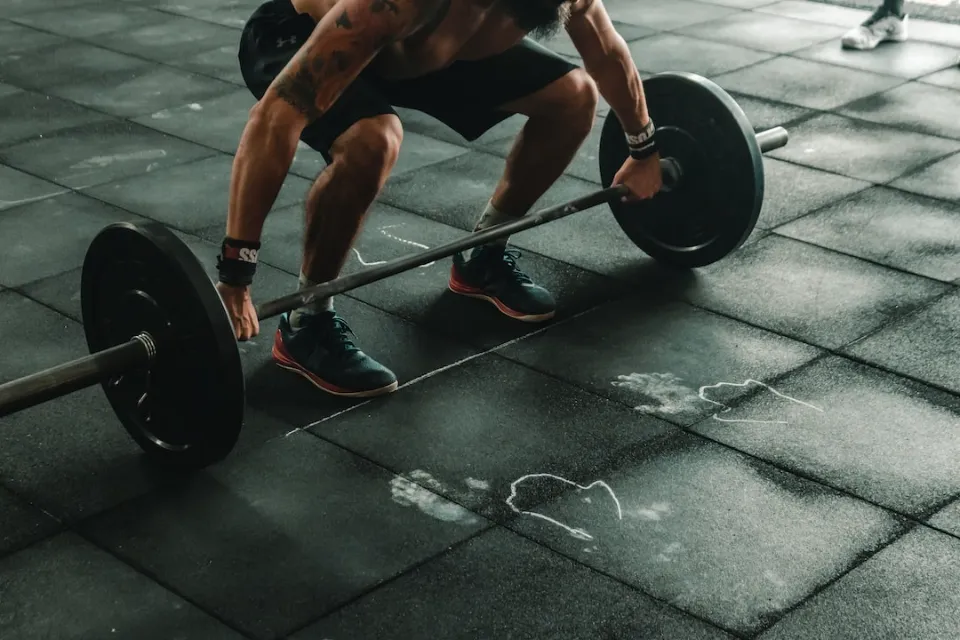
If you’re unsure of how to use a squat rack properly and, more importantly, safely. You should read this guide. A squat rack, also more appropriately known as a power rack, may seem intimidating to a beginner lifter. It is large, sturdy, tucked away in a dim area of the gym, and typically filled with an Olympic standard bar weighing 20 kg (45 lbs). It may occasionally be loaded with numerous weight plates. This wonderful piece of equipment has the power to alter your life, despite its intimidating appearance. not only in your squat life. The truth is that a power rack quickly rises to the top of your list of essential workout tools once you understand what it is and how to use it to its fullest.
In this article, we’ll start with the fundamentals of using a power rack effectively for squats. In addition to this, we’ll share some tips on how you can progress and improve your squat. Finally, we will list some additional exercises that can be performed with a power rack.
Table of Contents
Why Use a Squat Rack
If you’re not squatting already, you should start because they are unquestionably one of the most effective exercises you can do.
The squat is an extremely effective compound exercise that engages your biggest muscle groups in a single fluid motion. It has therefore earned the right to be a key exercise in your weightlifting workout regimen.
Squat racks are primarily used to help you advance your squat technique by gradually adding more weight. Leading you to amounts of weight that you otherwise wouldn’t be able to get into your start position unassisted.
The squat rack is ultimately vital to the committed weightlifter. Despite this, many lifters aren’t given the proper instruction when they first begin to lift.
Female clients of many trainers are rarely taught how to even use a squat rack. Ask your personal trainer to demonstrate how to incorporate the squat rack into your workout regimens if they haven’t already.
If you don’t have a trainer or anyone to show you how, keep reading because this guide is for you.
What Exercises Can You Do With a Squat Rack?
Even though they are called “squat” racks, in reality, power racks, half racks, and squat stands can be used for a SO MANY DIFFERENT EXERCISES.
Unsurprisingly, squats are the main exercise.
The hooks and pins on a rack’s front and back allow you to set up at a specific height; we’ll get to that in a minute.) for every color of squats you can think of.
But aside from that, there are a ton of other exercises you can perform on even the most basic of racks.
A pull-up bar was one of the first features I desired in my own squat rack so that I could perform chin-ups and other hanging exercises (such as dead hangs, hanging leg raises, etc.).
All types of presses, from the common bench press (incline, decline, flat—whatever floats your boat) to military press, are other common exercises you can perform with a squat rack.
Squat racks are great for holding a barbell at a height that allows for a variety of exercises, including bent-over barbell rows, shrugs, and rack pulls.
And of course, as just about every gym junkie will always note and complain about “that” lifter at the gym—you could do barbell bicep curls using a squat rack, too ?
Once you take into account the wide range of attachments that can be used with a squat rack—lat pulldown machines, pulley systems, landmine attachments, dip stations, Monolift, and on and on—the number of exercises you can perform with one increases very quickly.
The variety of exercises you can do with a squat rack is truly endless.
How to Use a Squat Rack
Get the setup right first, of course. To do that, the squat rack should be stripped of all weight.
Once you have an empty rack you can start to set up for your workout.
The bar position is the next factor you should think about. Make sure to get the bar height right because it’s important.
On your squat rack, locate the adjustable components and adjust them to roughly shoulder height. On some racks (like the one pictured above) the height adjusters are fixed, so in this case you just place the bar on the level that suits you.
Note that safety bars should always be used when using a squat rack for heavy loads. Therefore, depending on how low you squat, be sure to adjust the safety bars’ height.
A word of caution: Never perform a heavy squat by yourself without using the safety bars.
Another crucial point to remember is that you should squat as low as you can. Squatting heavily is inappropriate if you’re not doing it low.
Prior to loading, go back to the fundamentals and come to the rack with your quads and hamstrings parallel to the floor or at least at a parallel position.
Getting into Position
Set the empty bar to the proper height to position yourself. Before continuing, make sure to check the bar height.
If you can grab the bar at arm’s length, the height is correct. Your arms from this position should be roughly parallel to the floor.
From that position; your next step is to grip the bar tightly, with your hands slightly wider than shoulder-width apart.
To help you position yourself centrally, use the knurling and “notches” on the bar. You can do this by placing your index finger in the same position either side of the bar.
Maintain a firm grip and duck under the bar while paying attention to the position of your head. It’s critical that you stand in the middle of the bar; otherwise, the bar’s balance will be off, and you risk suffering an injury.
Finally, the bar should never rest on your neck; instead, it should rest on your upper back or shoulders.
In their training regimen, a high bar squat will typically be the most convenient and effective. This is where the barbell sits high on the shoulders/back, but not on the neck. rather than a low bar squat, in which the bar rests lower on the upper back. Powerlifters use the low bar squat a lot.
Lifting the Bar Off the Squat Rack
Before you lift the bar off the rack, take a deep breath and contract your core muscles. Prepare yourself for the weight you are about to lift. This helps to protect your back.
You should keep your shoulder blades squeezed tightly together and pulled down towards your bum. In order to give the bar a solid and stable platform to rest on, we do this.
With your core braced, the barbell positioned on your back and your grip tight, you are now ready to stand up and take the weight off the rack.
Establishing a Solid Foot Position
Your next move is to slide one foot (either one, it doesn’t matter) back in a straight line, then the other, once you are in a stable position with the weight on your back.
As we move into position, we slide our feet back so that we don’t rock the bar back and forth.
There is no longer any risk of the weight hitting the rack when you squat because it is now safely separated from it.
Now you can change your foot placement to a squat stance on both sides. Your feet should be shoulder-width apart and slightly turned out for a standard squat position.
Maintaining a straight back means keeping your weight on the middle of your feet.
From this position, you are now ready to sit back into your squat.

Mistakes to Avoid When You Use a Squat Rack
Not Trying
Avoiding any attempt at all is the first and most critical error you should make.
It may take some getting used to using a squat rack, but once you do, you will be able to benefit from all of its advantages.
Form and Foot Position
Even the most seasoned lifters need to regularly check themselves. Therefore, you cannot afford to let your standards slip just because you are able to squat.
Ensure that you are standing or squatting correctly, without rushing, and with good positioning at all times!
Too Much Weight
Avoid loading too much weight too soon. This practice is known as “ego lifting.” It’s not worth it; don’t do it.
As soon as you start adding weight to your squat you should be mindful of your posture and form at all times.
Playing with a loaded bar on your back is not a good idea!
Not Enough Weight
Remember that the point of a squat rack is to help you progress with weight, so don’t let yourself get stuck.
You should continue to add weight progressively, even if it’s only an extra 2 kg’s, it all adds up in the end!
Conclusion
By this point, hopefully, you realize just how much you can use this one small but essential piece of equipment.
The power rack is a versatile piece of equipment that, in contrast to many other pieces of gym gear, gives you a huge variety of workout options and is essential to many lifts.
Due to the user’s inability to initially position the loaded bar, heavy lunges, squats, and overhead work would be impossible without a power rack.
FAQs
Do You Face in Or Out on a Squat Rack?
The big secret is that when you squat, you face in the direction of the squat rack’s hooks. The procedure is as follows: You approach the squat rack from the side that the barbell is on. Then, with the bar on your shoulders, you stand up after placing your hands on the barbell and ducking your head underneath.
How Often Should You Use the Squat Rack?
Perform squats at least two to three times per week. Most athletes squat two to three times per week. This will give you more chances to develop your squat technique and give you the chance to plan various training adaptations (strength, hypertrophy, and power) for every workout.
Do Squats Burn Belly Fat?
In light of the fact that squats are an excellent exercise for losing body fat and developing lean muscle, you’re very likely to start losing body fat all over, including the belly and thighs, if you regularly perform them.
What Will 30 Days of Squats Do?
You can effectively develop the muscles in your legs and lower body by performing 100 squats per day for 30 days. The exercise must be carried out properly. When done incorrectly, they can lead to injury and strain.