How to Put Together a Clarinet: a Complete Guide
The clarinet comes together fairly quickly once you know how, despite the fact that it may seem like there are many moving parts. If you are unfamiliar with the clarinet’s components, we advise looking at our post on them. But once you are, just follow these easy steps, and your clarinet will be playing in no time.

Table of Contents
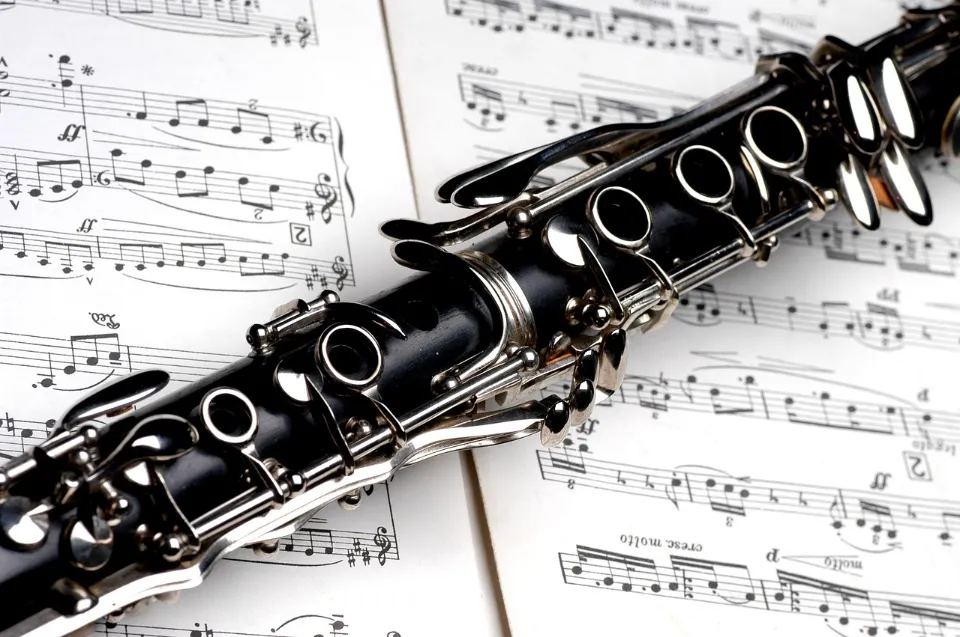
Parts of a Clarinet
Knowing the clarinet’s components is crucial before we start. Yes, there might be other accessories that could be used alongside a clarinet by some users, but the major parts of a clarinet are:
The mouthpiece
The barrel
The upper joint
The lower joint
The bell
These are the five essential components, and it is simple to identify them. For instance, the two joints, upper and lower, are the components that house all of the keys, and the mouthpiece is placed in the mouth. The bell is located at the instrument’s base, and the barrel joins the mouthpiece to the joints. Functionality would be the simplest way to identify them.
How to Put Together a Clarinet
Step 1: Identify the Pieces
Verify that the case is not upside down before opening it on a flat surface.
Check to see if all the pieces are there in your mind before identifying any missing ones.
Step 2: Start at the Bottom
Starting at the bottom and working your way up is the ideal order to assemble a clarinet.
Accordingly, you will first attach the bell and lower joint together.
Take extra care not to grip any keys during the entire assembly process because it’s incredibly simple to inadvertently apply a little bit too much pressure, which can result in the keys breaking or bending.
Step 3: Line Up the Joints
The third step in the assembly of your clarinet is to attach the upper joint to the lower joint, and this is probably the trickiest.
Don’t line up the keys right away because they might not fit together properly.
Such accidental key damage is simple for beginners to commit.
Instead, align the joints slightly off-center.
Once the joints are attached, turn the lower joint while gently pushing down the keys on the upper joint to align them properly.
But when aligning the joints, take care not to apply too much pressure.
Step 4: Attach the Barrel
The wide side of the barrel will now be attached to the upper joint.
Arrange the logos in a pleasing order for the best presentation.
When you come to tune your clarinet, you may need to adjust the position from where you started with the barrel fully pushed.
Step 5: Add the Mouthpiece
It’s time to put the mouthpiece on.
Take the mouthpiece cap off and
Before moving on, leave the ligature off.
Step 6: Ready the Reed
It has been customary to moisten the reed before attaching it by placing it in your mouth.
Make sure to wet the entire reed, not just the thin tip.
Due to its extreme fragility, the reed should not be knocked as this could cause it to break or chip, rendering it useless.
Step 7: Put on the Reed
Affix the ligature to the mouthpiece by loosening the appropriate screw(s) on the device.
The reed should be inserted between the mouthpiece and the ligature.
Aim to align the mouthpiece’s tip with the reed’s tip.
Avoid touching the reed’s tip because it is very likely to crack.
Your thumbs should only touch the reed’s stock as you adjust its position.
Tighten the screws on the ligature after the reed has been placed correctly.
Make sure you don’t overtighten the screw(s).

How to Disassemble Your Clarinet
Step 1: Remove the Reed
Gently unscrew the ligature while holding one thumb on the reed stock, then slip the reed off after the screws have been loosened.
To the best of your ability, try to remove the reed without touching the tip.
After playing, it’s best to give the reed some time to dry out before storing it in its case. This will allow you to wipe off any excess moisture and place the flat side of the reed on top of the case.
Reeds are extremely delicate, so once they are dry, store them in a reed case to prevent damage.
Step 2: Take Off the Mouthpiece
The clarinet mouthpiece should be removed in order to clean it in step two.
To avoid damaging the ligature while removing the mouthpiece by simply gripping it, make sure to remove it first.
With one hand holding the mouthpiece firmly and the other hand placing pressure between the barrel and upper joint, gently twist the mouthpiece back and forth until it comes off.
It will be harder at first when handling a new clarinet because the corks can be sticky.
Once the mouthpiece has been removed, clean it with the swab by inserting the string through the bottom and gently pulling it through the mouthpiece to make sure it is dry.
Replace the mouthpiece cap and ligature once the inside of the mouthpiece is dry before putting the clarinet safely back in its case.
Step 3: Clean the Clarinet
The clarinet should now be swabbed completely to ensure that all of the water has been removed from inside.
Just gently pull the string end of the swab through the instrument until it exits the barrel after being inserted through the bell.
Before continuing with the disassembly, repeat until it appears that the clarinet is dry.
Step 4: Take Off the Barrel
The barrel must be taken out next, and it can be done in a manner similar to how the mouthpiece was taken out.
Grip the upper joint and gently twist it back and forth, taking care not to damage any of the keys as you do so.
Once it’s off, quickly swab it once more to get rid of any remaining moisture before putting it back in the case.
Step 5: Remove the Upper Joint
The clarinet’s upper joint is taken out in step 5 of the procedure.
Again, if at all possible, we should avoid touching any of the keys because too much pressure could cause them to bend.
Take a firm hold of the clarinet’s upper joint just above the keys with your dominant hand, and then take a hold of the lower joint with your other hand close to the bottom. Pay close attention to the keys that are located on the side of both the upper and lower joints.
To separate the two pieces, gently twist them back and forth in quick motions while pulling upwards.
Reposition it in the case once it has been removed.
Step 6: Disconnect Lower Joint and Bell
Finally, we will disconnect the lower joint and the bell, always being careful to protect the keys from bending.
To disassemble it, use the same gentle twisting motion combined with quick back and forth movements.
You must be careful when changing the lower joint because the bridge key has a small metal piece protruding inside of it.
It’s possible to get your swab caught on this occasionally, so take care not to pull too hard and risk damaging it.
Place each instrument in its proper location inside the clarinet case once you’re finished.
Step 7: Final Cleaning
In order to ensure there is no moisture in any of the crevices, check each piece individually.
If any of the pieces still contain moisture, run the swab through them.
And of course, when you’re done, properly shut the case to avoid any mishaps when lifting it.

Conclusion
Due to the instrument’s relatively small number of parts, a clarinet is simple to put together. It’s possible that some people will decide to begin the process at the top. This doesn’t really change anything, but no matter where someone chooses to begin assembling the instrument, they should always take the necessary precautions.
You can postpone trying to assemble a clarinet on your own until a teacher or instructor shows you how to do it in person. The most important things are doing it correctly and doing so with as little harm to the instrument as possible, but that is also fine.
FAQs
Is It OK to Leave Clarinet Assembled?
You’ll end up with a moldy mouthpiece if you leave a reed on the mouthpiece for a long time. However, leaving the instrument assembled should be fine as long as you are taking good care of it and are not putting it in danger.
Why is My Clarinet Squeaking?
Damaged reeds are a leading cause of clarinet squeaks. To ensure that it vibrates uniformly and doesn’t squeak, a reed needs to be balanced. To know if you have a balanced reed, check that the “V” shape on the reed is even by holding it up to the light to see if each side is shaped the same.
What Age is Clarinet For?
The clarinet is probably the simplest wind instrument to learn when you’re young; if the child’s arms are long enough, we recommend starting them at age eight, if their fingers can reach all the keys.
How Do You Break in a New Clarinet?
Break-In Period
1. For the first two weeks, play your new clarinet for ten (10) to fifteen (15) minutes at a time, thoroughly cleaning it and giving it at least four hours to rest in between sessions.
2. Play your new Backun Clarinet for up to thirty (30) minutes per session in week three.